Why Gitea? Taking Control of Your Git Workflow
I wanted a self-hosted Git solution, and Gitea seemed like a good balance between simplicity and functionality. Plus, it’s lightweight, which is perfect for my Proxmox LXC.
Step 1: Installing Gitea with Proxmox Helper Scripts
Proxmox VE is fantastic, and the community has made things even easier with helper scripts. These scripts automate the creation and basic configuration of LXC containers for various applications, including Gitea.
To get started, log in to your Proxmox host and run the Gitea LXC script.
# Example command - find the exact one for Gitea from the helper scripts repo
bash -c "$(wget -qLO - https://raw.githubusercontent.com/community-scripts/ProxmoxVE/main/ct/gitea.sh)"
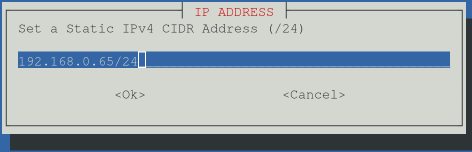
The script will ask you some questions. You can generally accept the defaults, but pay attention to the network settings. I recommend setting a static IP address for the container, if you do you will also to configure the gateway IP adress, in my case is my routers ip. You’ll also set the container’s resources (CPU cores, RAM, disk size) – Gitea is pretty lightweight, so you don’t need much to start.
Step 2: Initial Access and Noting the Details
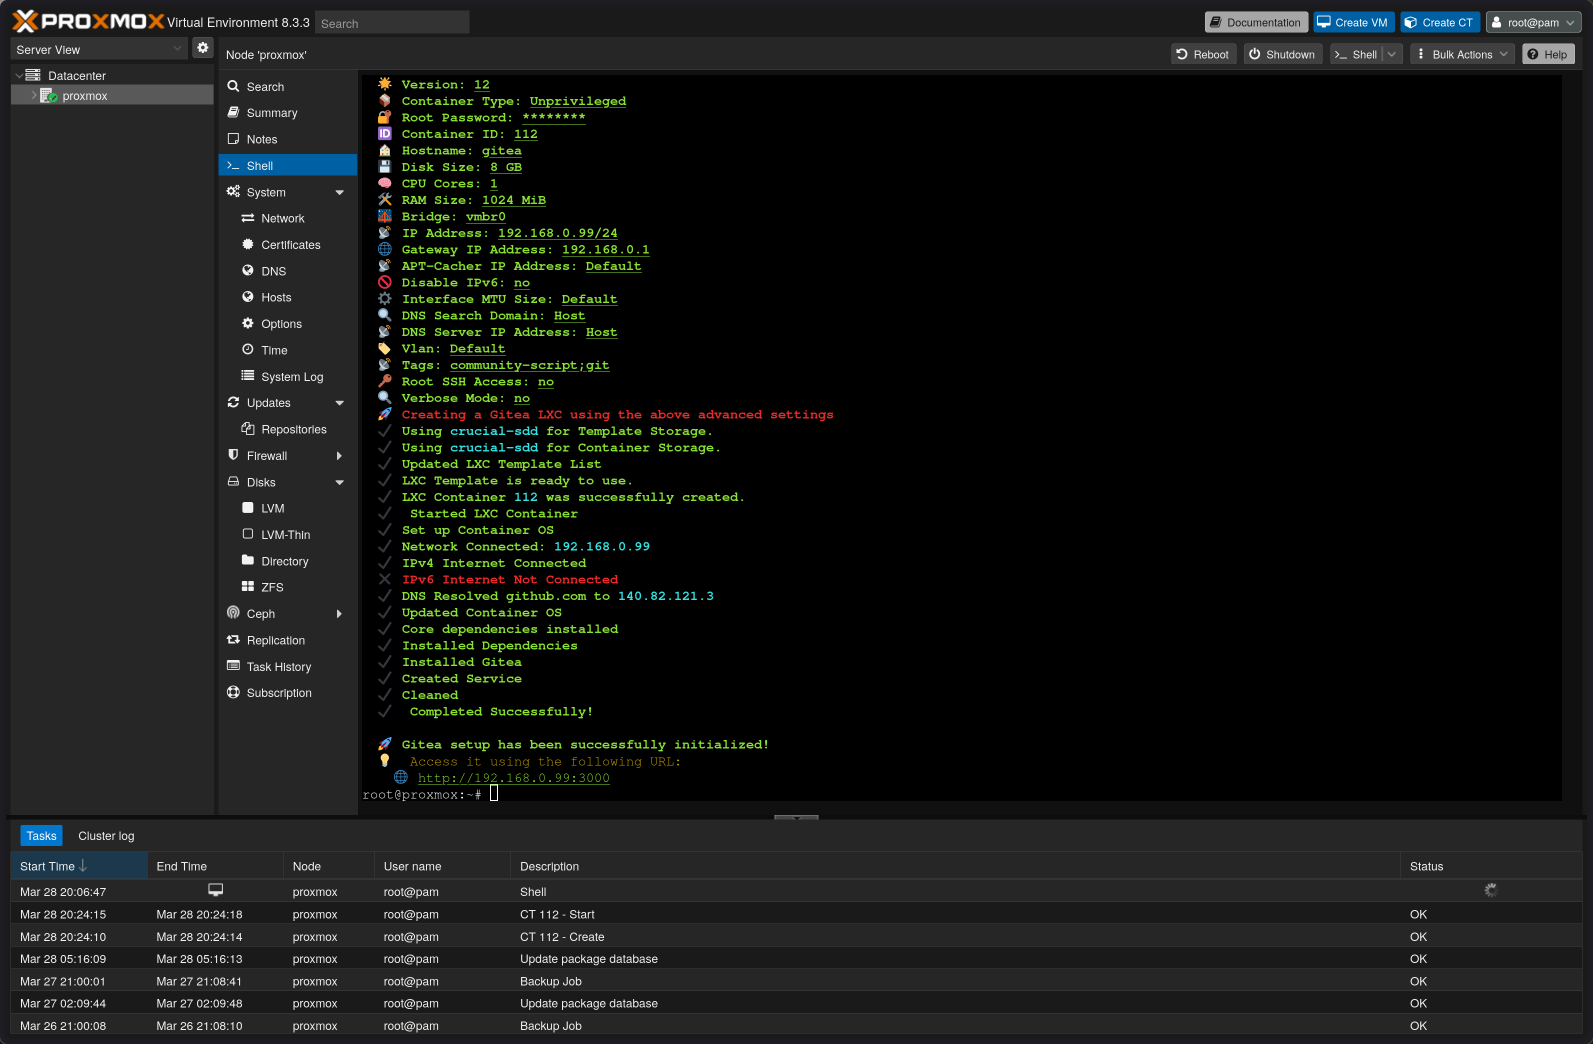
Once the script finishes, the container will boot up, and Gitea will be running. The script usually outputs the IP address and port Gitea is listening on (typically port 3000).
Make a note of this internal IP address and port (e.g., 192.168.0.99:3000). You’ll need it for the next step.
Step 3: Exposing Gitea with a Cloudflare Tunnel (HTTP)
We want to access Gitea from anywhere, but opening firewall ports isn’t ideal. Cloudflare Zero Trust Tunnels solve this by creating a secure, outbound-only connection from your homelab to Cloudflare’s edge.
If you don’t already have a Cloudflare service running, you’ll need to create one. You can either:
- Use the helper script (recommended).
- Manually set up an LXC container and install
cloudflaredby following these steps:
1. Set Up the Cloudflare Tunnel
- Log in to your Cloudflare dashboard. Go to Zero Trust → Access → Tunnels.
- Create a new tunnel. Name it something descriptive, like
gitea-server. - Install the connector. Cloudflare will provide installation commands for
cloudflared. Run them inside your Cloudflare LXC container.
2. Configure a Public Hostname: This is how you’ll access Gitea via the web:
- Add a new public hostname.
- Choose a subdomain (e.g.,
git.yourdomain.com). - Set the Service Type to
HTTP. - Point it to your Gitea LXC’s internal IP and port (e.g.,
http://192.168.0.99:3000). - Save the hostname and the tunnel configuration.

Now, you should be able to access https://git.yourdomain.com (or whatever subdomain you chose) in your browser, and it will load the Gitea setup page!
Step 4: Configuring Gitea
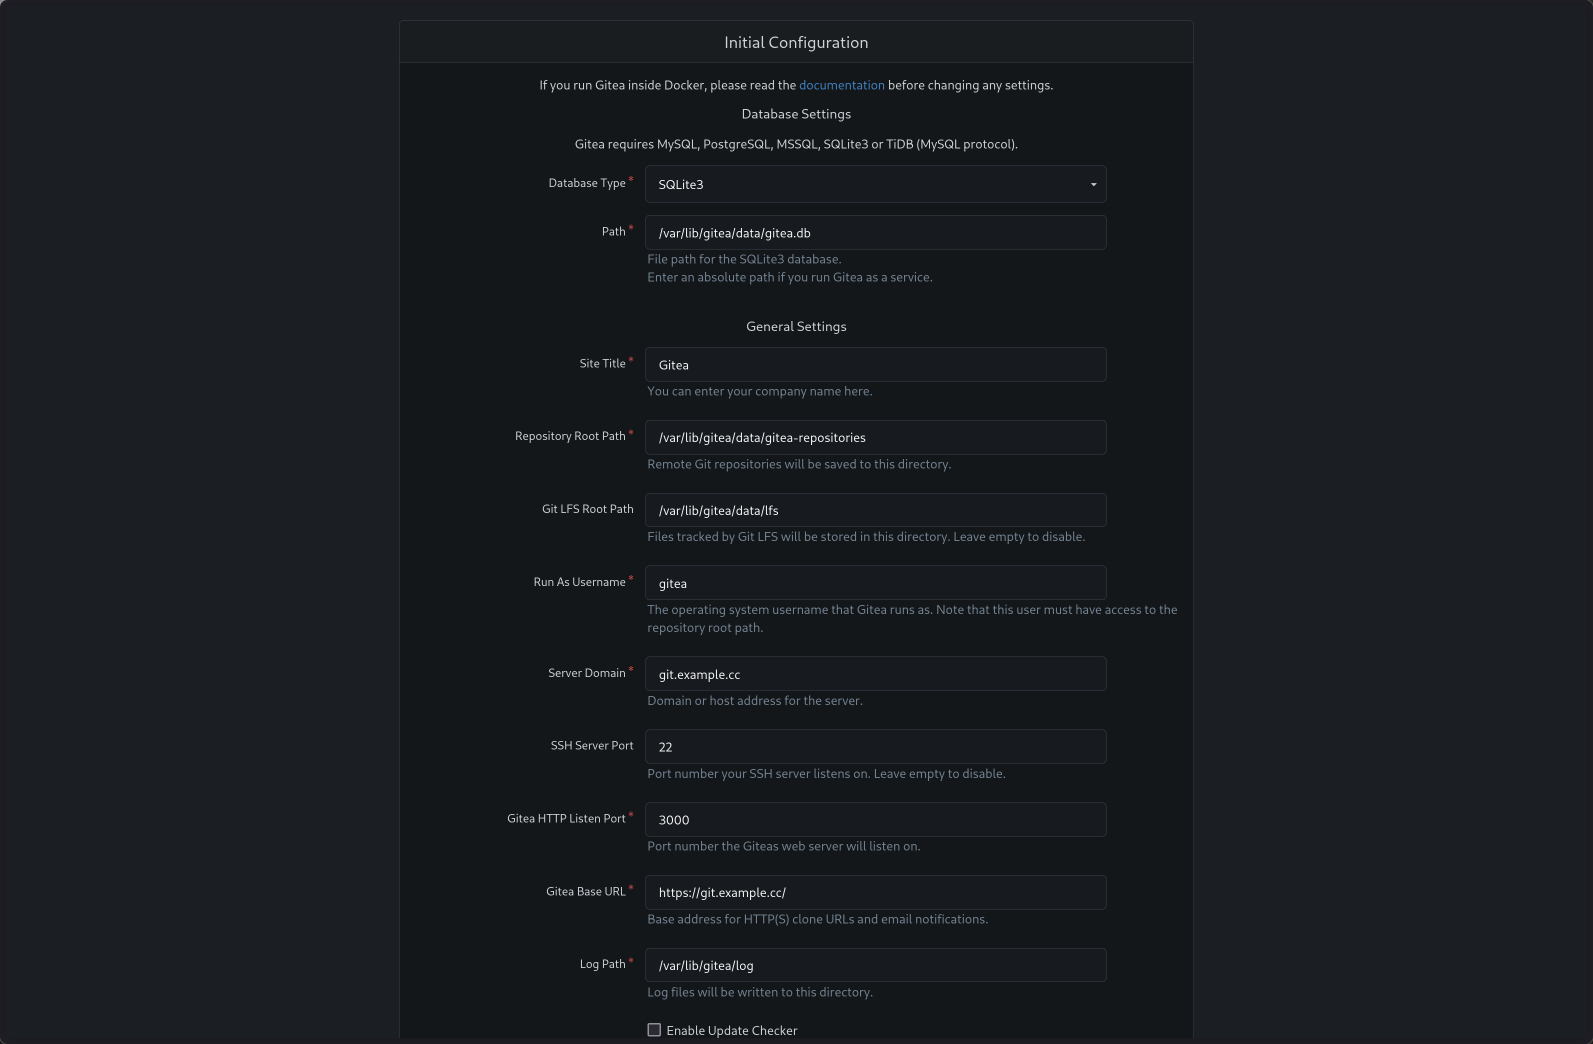
Accessing your Gitea instance via the Cloudflare URL (git.yourdomain.com) will present you with the initial configuration page. Here’s what I did:
- Database: For a personal setup or small team,
SQLite3is perfectly fine and the simplest option. If you anticipate heavy usage or many users down the line, consider setting up PostgreSQL or MySQL separately. - General Settings:
- Site Title: Give your Gitea instance a name.
- Server Domain: This should be the domain you set up in the Cloudflare tunnel (e.g.,
git.yourdomain.com). - Gitea Base URL: This should be the full URL, including
http://orhttps://(e.g.,https://git.yourdomain.com/). Important: Since Cloudflare handles the HTTPS, usehttps://here if your tunnel is set up correctly.
- Optional Settings (Admin Account & More):
- Scroll down to create your Admin Account. Choose a secure username and password. Write these down!
- Under “Server and Other Service Settings,” I recommend disabling self-registration if it’s just for you or a known group. This prevents random sign-ups.
- Review other settings, but defaults are generally okay to start.
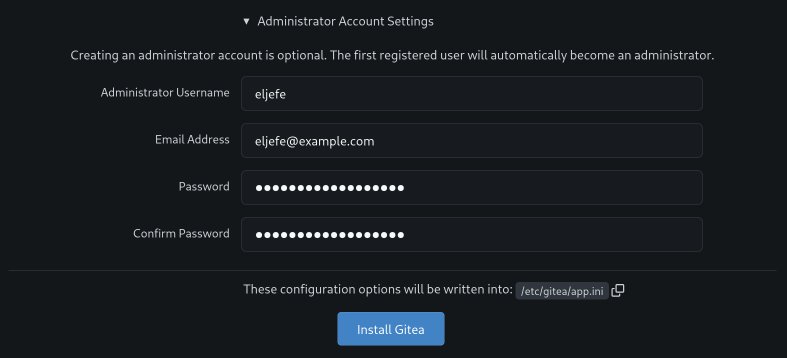

Click “Install Gitea”. It might take a minute or two. Once done, you’ll be redirected to the login page or logged in directly as the admin user.
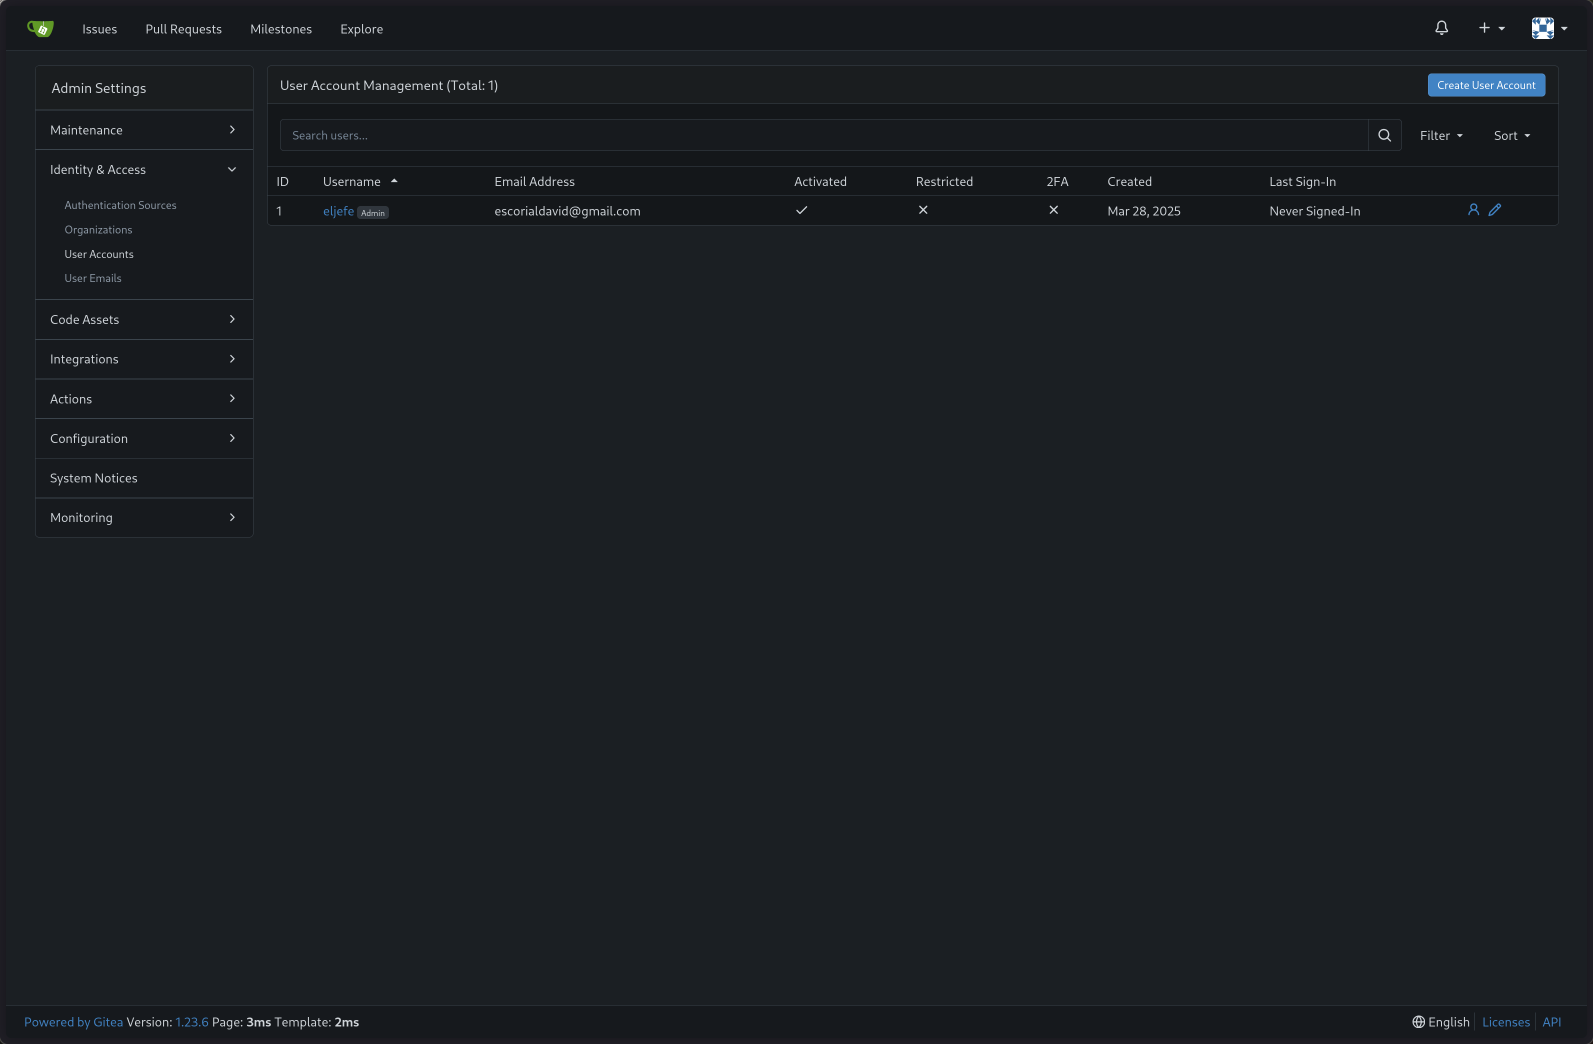
Step 5: User Management - Create Your Day-to-Day User
While you can use the admin account for everything, it’s better practice to create a regular user account for your daily Git activities.
- Log in as the admin user you just created.
- Click the site administration icon (usually a wrench or gear) in the top right.
- Navigate to
User Accounts. - Click
Create User. - Fill out the details for your regular user account (username, email, initial password).
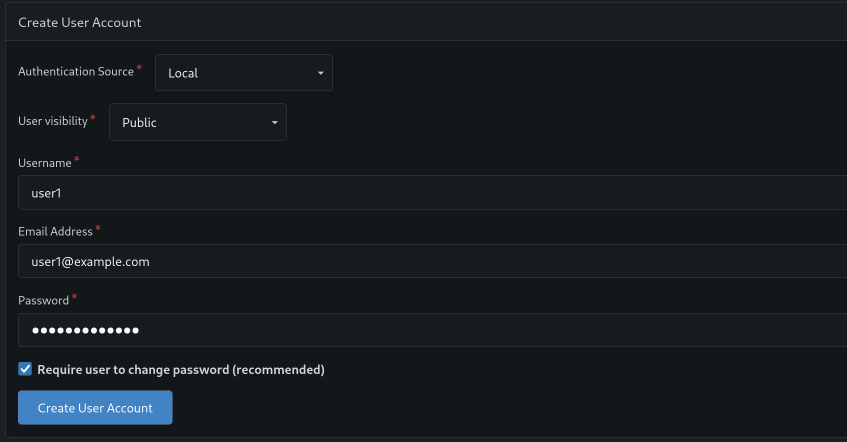
Now, sign out of the admin account and log in as the new user you just created. Gitea will likely prompt you to change the initial password immediately. Do that.
Step 6: Adding Your SSH Key
To push and pull repositories using Git over SSH (the recommended way), you need to add your public SSH key to your Gitea account.
- Make sure you’re logged in as your regular user.
- Click your avatar/profile icon in the top right corner and select
Settings. - Go to the
SSH / GPG Keystab.
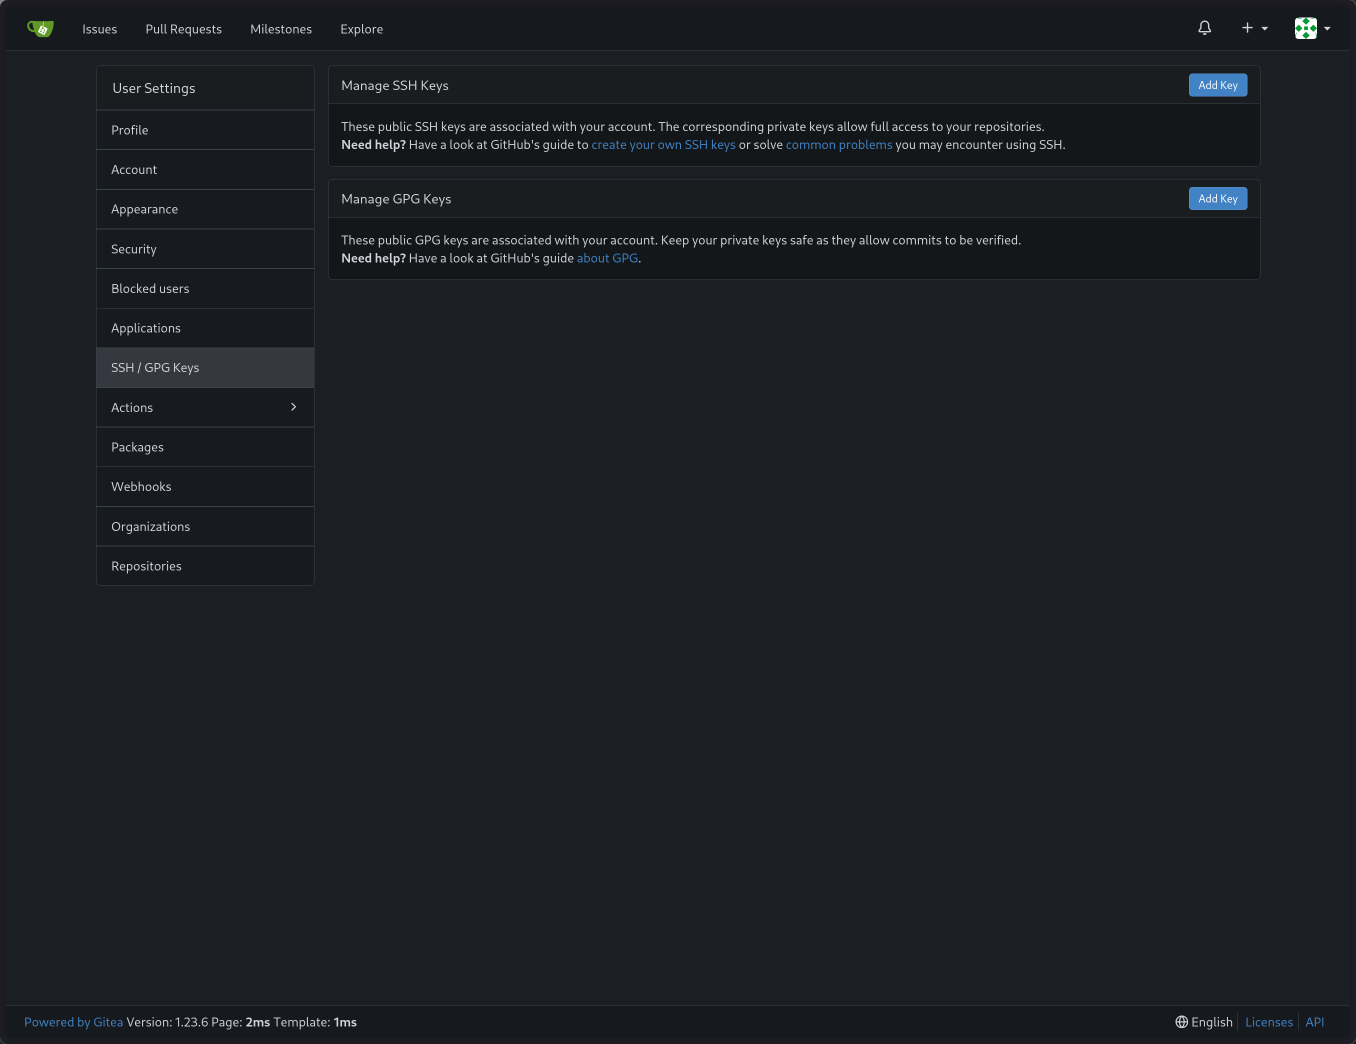
- Click
Add Key. - Give the key a recognizable
Key Name(e.g., “My Laptop”). - Paste your public SSH key into the
Contentbox. You can usually get this by running:
(Pro-tip: On Linux with Wayland or X11, you can use tools likecat ~/.ssh/id_ed25519.pub # Or id_rsa.pub if you use RSAwl-copyorxclipto copy directly:cat ~/.ssh/id_ed25519.pub | wl-copy) - Click
Add Key.
You should see a confirmation that the key was added successfully.
Step 7: Setting Up the SSH Tunnel (Cloudflare Again)
Just like we tunneled HTTP traffic, we need to tunnel SSH traffic. This requires another entry in your Cloudflare tunnel configuration.
- Go back to your tunnel configuration in the Cloudflare Zero Trust dashboard (
Access->Tunnels-> select your tunnel ->Configure). - Go to the
Public Hostnamestab. - Click
Add a public hostname. - Subdomain: Choose a different subdomain specifically for SSH (e.g.,
git-ssh.yourdomain.com). This keeps things clean. - Service:
- Type:
SSH - URL:
ssh://<GITEA_LXC_IP>:22(e.g.,ssh://192.168.0.99:22). Make sure this is the IP address of your Gitea LXC container and the standard SSH port 22.
- Type:
- Save the hostname.

Step 8: Configuring Your Local SSH Client
Your computer’s SSH client needs to know how to use this Cloudflare tunnel when connecting to your Gitea SSH domain.
-
Install
cloudflaredon your local machine. This is the machine you’ll be runninggit clone,git push, etc., from.- On Debian/Ubuntu:
sudo apt update && sudo apt install cloudflared - For other systems (macOS, Windows, other Linux distros), check the official Cloudflare documentation
- On Debian/Ubuntu:
-
Log in
cloudflared: Runcloudflared loginin your terminal and follow the browser prompts to authenticate with your Cloudflare account. -
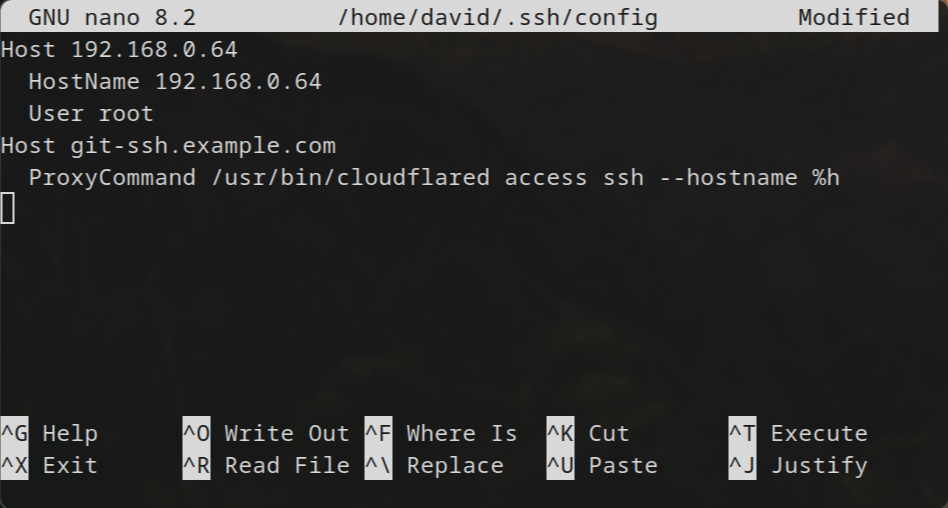
Edit your SSH config file: Open
~/.ssh/configin a text editor (create it if it doesn’t exist:nano ~/.ssh/config). -
Add the following block, replacing
git-ssh.yourdomain.comwith the SSH subdomain you created:Host git-ssh.yourdomain.com ProxyCommand /usr/local/bin/cloudflared access ssh --hostname %h- Important: Verify the path to
cloudflared. Runwhich cloudflaredin your terminal to find the correct path and update theProxyCommandline if necessary (it might be/usr/bin/cloudflaredor something else).
- Important: Verify the path to
Save the file (Ctrl+O, Enter in nano) and exit (Ctrl+X).
Step 9: Pointing Gitea to the Correct SSH Domain
Gitea needs to tell users the correct SSH clone URL, which now involves our special SSH tunnel domain.
-
SSH into your Gitea LXC container.
-
Edit the Gitea configuration file. The exact path might vary slightly depending on the helper script, but it’s usually
/etc/gitea/app.inior/var/lib/gitea/custom/conf/app.ini. Usenanoor your preferred editor:sudo nano /etc/gitea/app.ini -
Find the
[server]section. -
Change the
SSH_DOMAINvariable to match the subdomain you created for the SSH tunnel:[server] ; Domain name to be exposed in SSH clone URL ; Default is %(DOMAIN)s SSH_DOMAIN = git-ssh.yourdomain.com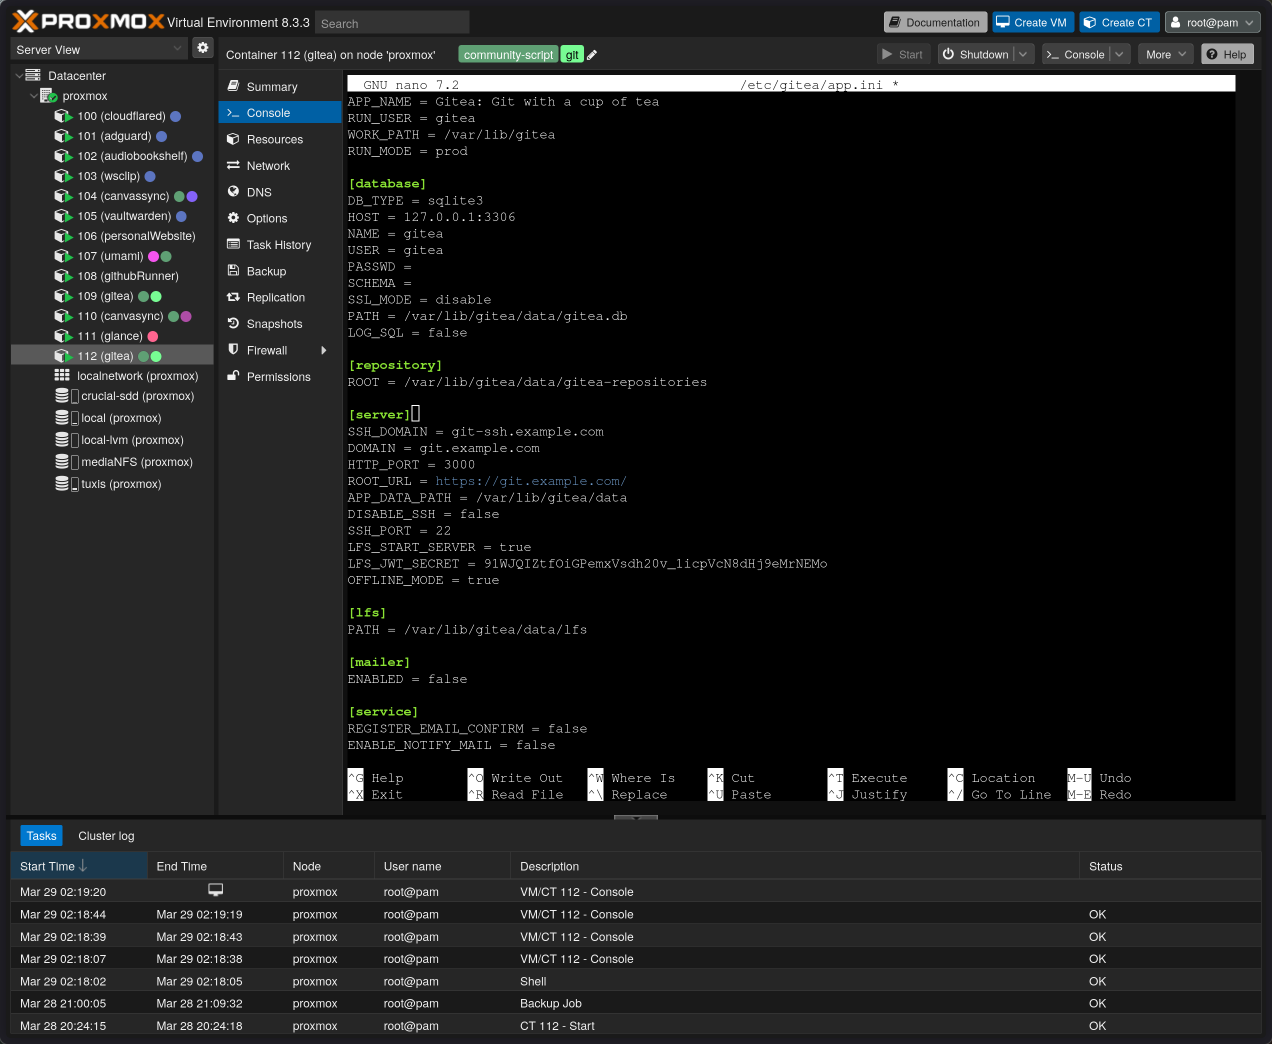
-
Save the file (Ctrl+O, Enter in
nano) and exit (Ctrl+X). -
Restart the Gitea service for the change to take effect:
sudo systemctl restart gitea
Tip: The app.ini file has tons of configuration options. Check out the Gitea documentation for more: https://docs.gitea.com/next/administration/config-cheat-sheet
Step 10: Testing Time! Create and Clone a Repo
The moment of truth!
- Go to your Gitea instance in the browser (
https://git.yourdomain.com). - Log in as your regular user.
- Create a new repository (click the ”+” icon -> New Repository). Give it a name (e.g.,
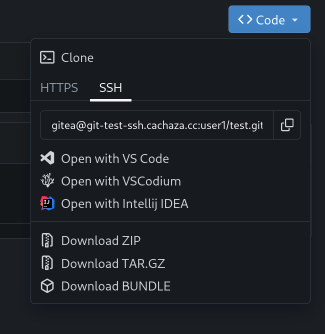
test-repo), initialize it with a README, and create it. - On the repository page, find the clone URL dropdown. Make sure
SSHis selected. Copy the SSH URL. It should look like[email protected]:YourUsername/test-repo.git.
- Open a terminal on your local machine (where you configured
~/.ssh/configand added your key to Gitea). - Run the
git clonecommand with the copied URL:git clone [email protected]:YourUsername/test-repo.git - If this is the first time connecting via SSH through the tunnel, you might get a host authenticity warning. Type
yesto continue.
If everything is set up correctly, the repository should clone successfully to your local machine!
Try making a change, committing, and pushing:
cd test-repo
echo "Testing" >> README.md
git add README.md
git commit -m "Test push"
git push origin main
This should also work seamlessly.
Security Doesn’t Stop Here
Okay, so we have a working Gitea setup accessible via secure Cloudflare tunnels. That’s a great start! But here are a couple more things to seriously consider:
- Enable Two-Factor Authentication (2FA): Go into your user settings (and the admin settings!) in Gitea and set up 2FA. This adds a significant layer of security to your accounts.
- Cloudflare Access Policies: For even tighter control, go back to the Cloudflare Zero Trust dashboard. Under
Access->Applications, you can create an Application.- Choose “Self-hosted”.
- Link this application to the hostnames you created for your tunnel (
git.yourdomain.comandgit-ssh.yourdomain.com). - Configure policies to define who can access these hostnames. You can require users to log in via GitHub, Google, email one-time passcodes, etc., and restrict it only to specific email addresses (like your own). This adds an authentication layer before anyone even reaches your Gitea login page or the SSH port via the tunnel.
Conclusion: Your Own Little Git Corner
And there you have it! A self-hosted Gitea server running smoothly in a Proxmox LXC, accessible from anywhere thanks to Cloudflare Tunnels. It took a few steps, but now you have full control over your Git workflow, repositories, and user access.
This setup works great for personal projects or small teams. It’s a bit more involved than just signing up for GitHub, but the control and learning experience are worth it, in my opinion.
Let me know if you try this out or have any suggestions! Happy coding!